Dryers are essential appliances for convenient laundry care.
However, a common issue arises when a Frigidaire dryer operates normally in all other aspects but fails to generate heat. This problem can be frustrating, leaving clothes damp and requiring extended drying times.
In this guide, we’ll explore each potential culprit, from the heating element to the thermistor, empowering you to diagnose and potentially resolve the issue.
Quick Overview: Several factors can contribute to a Frigidaire dryer’s inability to heat. The most common cause is a faulty heating element, often due to burnout or damage. Other potential issues include a malfunctioning heater relay (common in newer models), a broken motor centrifugal switch, or a defective thermistor sensor. Each of these components plays a crucial role in the dryer’s heating process, and their failure can disrupt the generation of heat.
1) Dryer Heating Element: The Primary Suspect (95% of Cases)
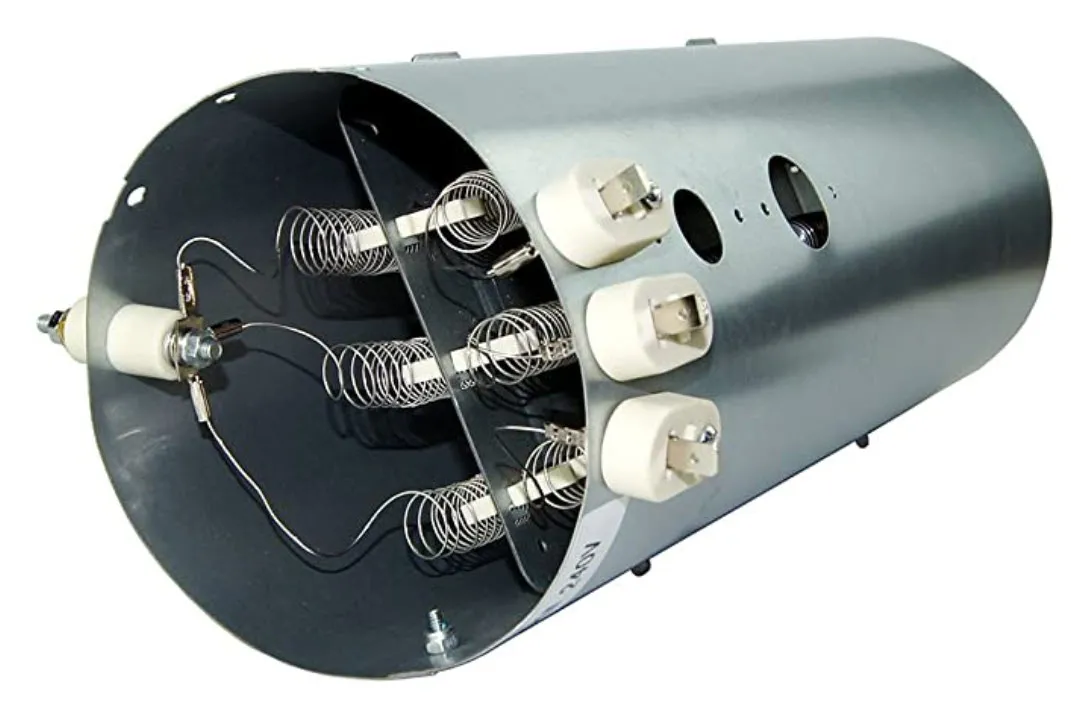
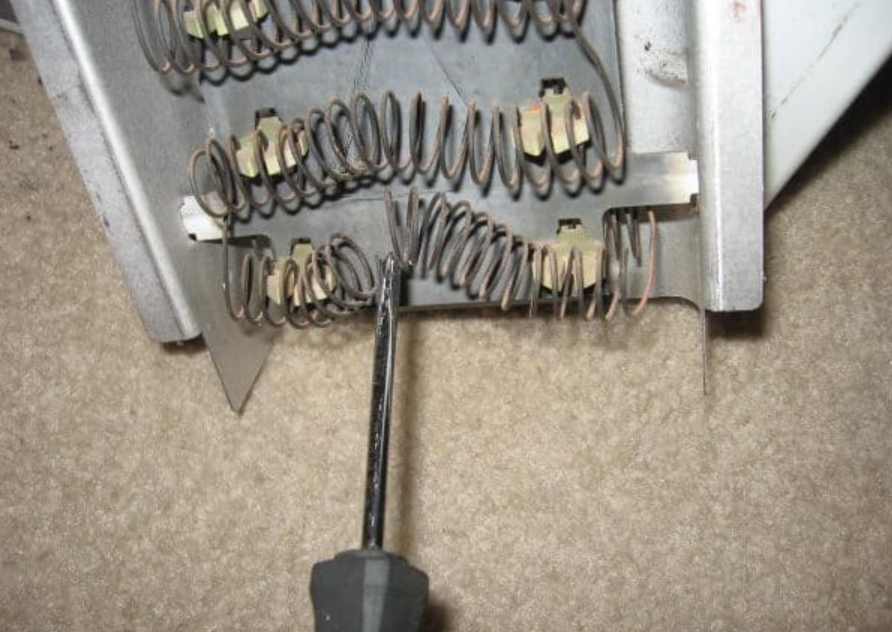
The heart of the dryer’s heating system is the heating element.
This component is responsible for generating the heat necessary to evaporate moisture from your clothes. In Frigidaire dryers, the heating element is typically located at the back of the dryer, often within a separate compartment. It’s characterized by its round shape and visible metal coils.
How it works: When a drying cycle begins, electrical power is directed to the heating element. The element’s coils, designed to resist the flow of electricity, convert this electrical energy into heat. A blower then forces air across these heated coils, circulating the warm air through the dryer drum and out through the vent.
Why it fails: Heating elements can fail for various reasons.
Loose or disconnected electrical connections can prevent power from reaching the element, rendering it useless. Overheating is another common cause.
Prolonged exposure to excessive temperatures can damage the element, causing it to malfunction. This overheating can sometimes be attributed to a blocked dryer vent, which restricts airflow and traps heat within the dryer.
A restricted vent forces the dryer to work harder, and the resulting heat buildup can damage components like the heating element.
How to fix: Replacing a heating element requires caution and some technical know-how.
If you’re not comfortable working with electrical appliances, it’s best to seek professional assistance. However, if you’re determined to tackle the repair yourself, follow these steps:
- Disconnect the power: Absolutely crucial! Unplug the dryer from the power outlet or turn off the circuit breaker supplying power to the appliance. This prevents the risk of electric shock.
- Consult the manual: Locate the user manual or technical sheet for your specific Frigidaire dryer model. These documents contain valuable information, including diagrams and instructions for accessing the heating element. If you can’t find the physical copies, search for them online using your dryer’s model number.
- Access the heating element: This usually involves removing access panels on the back of the dryer. In some cases, you may need to remove the dryer drum itself to gain access to the heating element.
- Remove the old element: Once you’ve located the heating element, carefully disconnect the electrical connectors attached to it. Then, remove the screws securing the element in place.
- Install the new element: Install the new heating element by reversing the removal process. Ensure the electrical connections are securely attached and that the element is properly mounted.
- Reassemble: Replace any panels or the drum that you removed during the process.
- Test: Plug the dryer back in and run a drying cycle to ensure the new heating element is functioning correctly.
2) Heater Relay: The Control Board Connection (Newer Models)
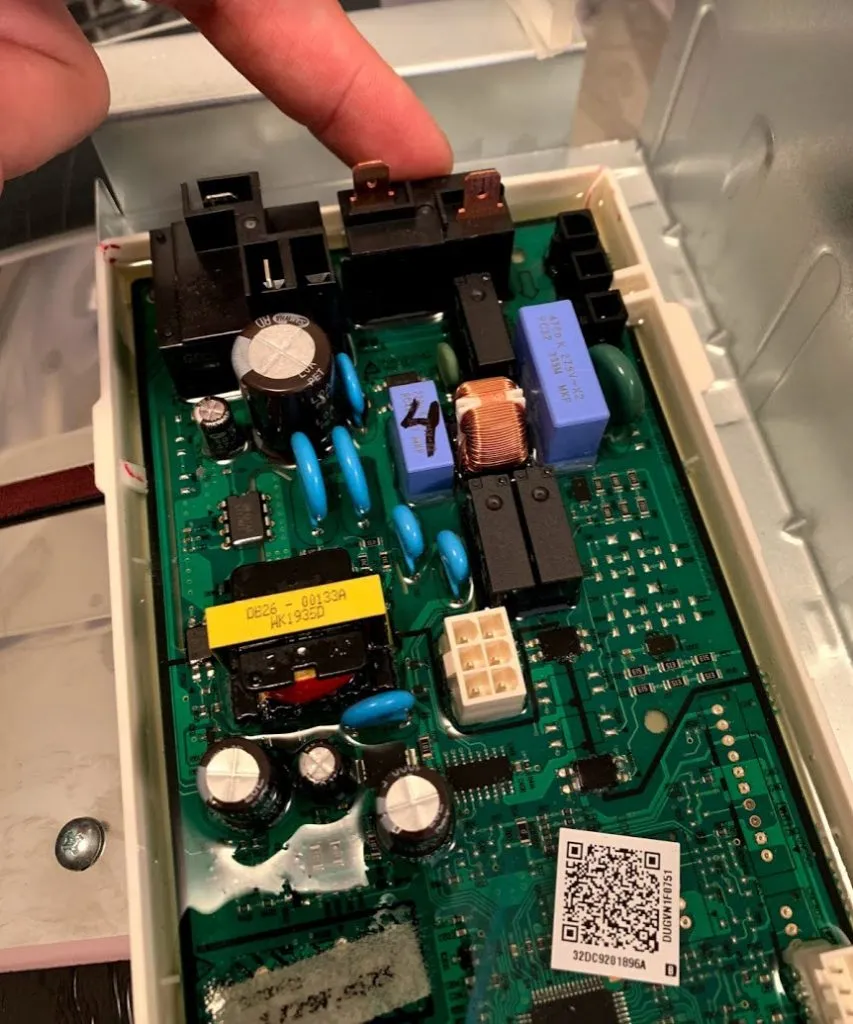
What it is: In newer Frigidaire dryers, a heater relay, an electrically operated switch, manages the flow of electricity to the heating element.
The control board uses the relay to regulate when and how long the heating element is active.
How it works: The heater relay acts as a gatekeeper, controlling the power supply to the heating element.
The control board sends signals to the relay, instructing it to open or close the circuit, thereby turning the heating element on or off.
Why it fails: Over time, the electrical contacts within the relay can wear out, preventing it from making a proper connection. The relay’s coil, responsible for opening and closing the switch, can also malfunction.
A faulty relay can prevent the heating element from receiving power, even if the element itself is in good condition.
How to fix: Replacing the heater relay requires some soldering skills.
If you’re not comfortable with soldering, consider replacing the entire control board or seeking professional repair.
- Identify the correct part: Refer to your dryer’s user manual or technical sheet to determine the correct replacement relay for your model. Contacting Frigidaire’s technical support can also be helpful.
- Disconnect the power: Unplug the dryer or turn off the circuit breaker.
- Access the control board: Locate the control board and remove any necessary access panels.
- Replace the relay: Carefully unsolder the old relay from the control board and solder the new relay in its place. Double-check the connections to ensure they are correct. Taking a picture of the control board before removing the old relay can be beneficial for reference.
- Reassemble and test: Reassemble the dryer and test the heating function.
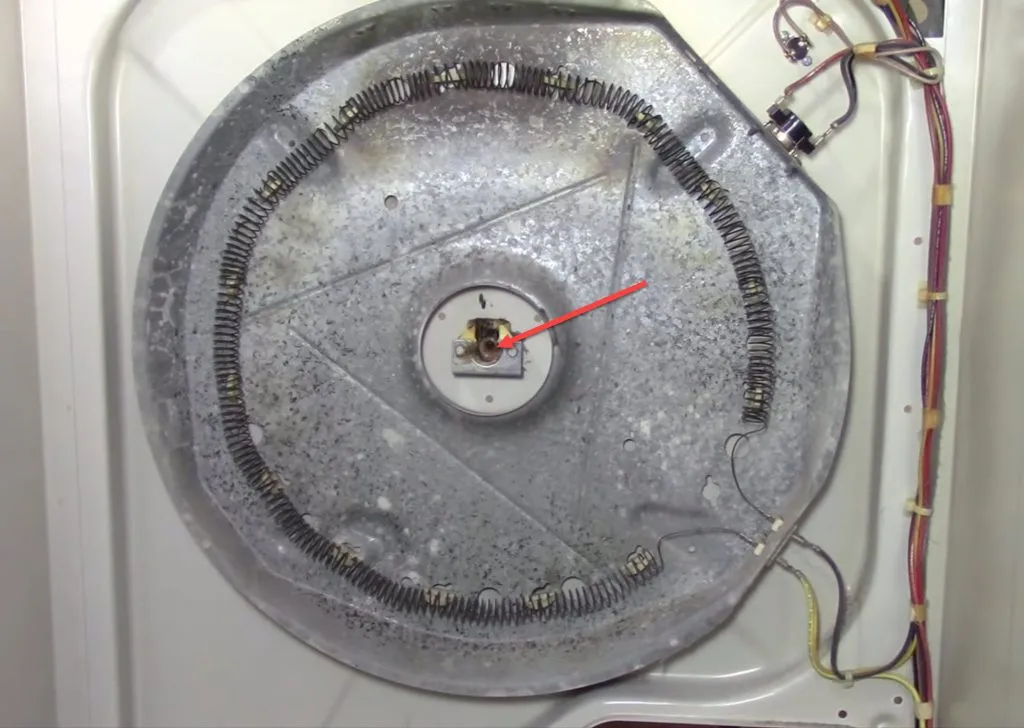
3) Motor Centrifugal Switch: Safety First
What it is: The motor centrifugal switch is a safety mechanism designed to prevent the heating element from operating unless the dryer drum is rotating.
This feature minimizes the risk of overheating and fire if the drum were to become stuck.
How it works: This switch is linked to the dryer motor. When the drum spins, centrifugal force activates the switch, completing the circuit that powers the heating element.
If the drum stops spinning, the switch opens the circuit, cutting off power to the heating element.
Why it fails: The centrifugal switch can malfunction due to wear and tear, becoming stuck in either the open or closed position. Lint, dirt, and debris can also accumulate around the switch, obstructing its operation.
How to fix: Troubleshooting the centrifugal switch can be challenging due to its location near the motor.
Professional assistance is recommended if you’re not experienced with appliance repair.
- Disconnect the power: Unplug the dryer or turn off the circuit breaker.
- Access the motor: This may require removing access panels and potentially the drum to reach the motor and the centrifugal switch.
- Inspect and clean: Visually inspect the switch for any signs of damage or obstruction. Clean any lint or debris that may be interfering with its operation.
- Test continuity: Use a multimeter to check the continuity of the switch. If there is no continuity when the drum is spinning (or should be spinning), the switch may need to be replaced.
- Consider motor replacement: In some cases, it might be more practical and reliable to replace the entire motor assembly, as the centrifugal switch is often integrated with it.
- Reassemble and test: Reassemble the dryer and test the heating function.
4) Thermistor Sensor: Temperature Regulation
What it is: A thermistor is a type of resistor that changes its resistance based on temperature.
In a Frigidaire dryer, the thermistor works in conjunction with the control board to monitor the dryer’s internal temperature.
How it works: The thermistor is strategically placed within the dryer’s airflow path. It senses the temperature of the air and sends this information to the control board.
The control board uses this data to adjust the heating element’s output, ensuring the dryer maintains the desired temperature.
Why it fails: A faulty thermistor can provide inaccurate temperature readings to the control board.
If the thermistor mistakenly reports a high temperature, the control board may prevent the heating element from turning on, even if the dryer is actually cool.
How to fix: Replacing the thermistor can be a straightforward process.
- Disconnect the power: Unplug the dryer or turn off the circuit breaker.
- Locate the thermistor: Refer to your dryer’s user manual or technical sheet to find the thermistor’s location. It’s often near the blower.
- Remove the old thermistor: Disconnect the electrical connectors and remove the screws holding the thermistor in place.
- Install the new thermistor: Install the new thermistor, reconnect the electrical connectors, and secure it with the screws.
- Reassemble and test: Reassemble the dryer and test the heating function.

Abdul Kader, a handy guy and experienced founder of a TV repair shop in Gulshan, Dhaka, Bangladesh. He is mainly an expert in understanding and repairing different types of issues with Smart TVs and providing helpful insights on how to keep them in good working order. Read his Full Story.