
Television has changed a lot lately.
It used to be a small, plain TV, but now it’s a fancy entertainment center.
New TVs have better pictures thanks to technology. However, the picture isn’t always perfect, even on the newest TVs.
That’s why it’s good to learn how to make your TV picture better for a more exciting time.
This article will explain six easy ways to make your TV picture better and make you feel like you are in a movie theater.
Let’s dive in…
Step 1: Change your TV’s location
Where you put your TV can make a big difference in how much you enjoy watching it.
Make sure you sit directly in front of it, at eye level, so you can see everything clearly.
If you sit to the side when watching an LCD TV, the picture might look weird and not so good.
However, If you’re always moving around to see better, think about moving the TV to a better spot.
Here are some things to keep in mind:
♦ First, think about where you usually sit to watch TV. Put the TV where you can see it comfortably without straining your neck or eyes.
♦ Also, think about the light. If there’s a lot of sunlight, try to put the TV where it won’t get direct sunlight.
Step 2: Adjust your TV’s picture mode

Have you ever wondered why the picture quality and overall viewing angle of your TV seemed so appealing when you first saw it in the store?
Well, that’s because TVs in stores are typically tuned to their best settings to show off their top features.
But once you bring the TV home and set it up, the picture quality might not look as impressive as it did in the store.
That’s why you should adjust the mode yourself.
If you want the sharpest and clearest picture, use the “Movie” or “Cinema” mode. But, if you’re more interested in saving energy, use the “Energy Saving” mode.
Here are the available picture modes that you can use:
- Standard.
- Dynamic.
- Vivid.
- Game.
Experiment with varying modes of the picture until you find the one right for you.
Tips: “Standard” mode is friendly for daytime, while “Vivid” is ideal for a bright room.
Step 3: Balance Sharpness

TVs have a variety of sharpness settings that you can adjust to suit your preferences.
The higher the sharpness setting, the clearer and more defined the picture.
However, if the sharpness is set too high, it can cause the picture to appear artificial and can be hard on the eyes.
Simply experiment with the different settings to find the perfect balance for your TV.
Sharpness setting you may not need to touch since picture mode usually does it for you. You can try adjusting the brightness and contrast of your TV. When adjusting brightness, put something dark on the screen. In contrast, something set in daylight is best.
Step 4: Try turning Motion smoothing On/Off
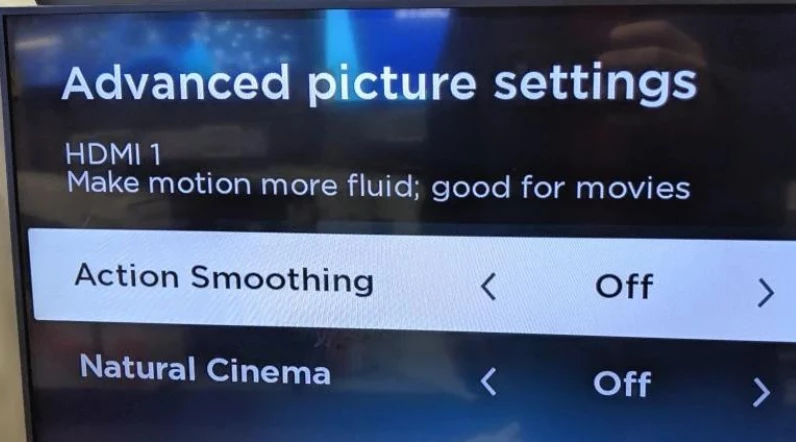
Motion smoothing basically designed to reduce motion blur and make fast-paced action look smoother on your screen.
It does this by interpolating new frames between the existing ones.
Look for “Motion Control” (or something similar) from the menu. Turn it on or off, or there will be an option to increase or reduce it.
However, sometimes it may make the content look worse, creating an unnatural “soap opera effect.”
If you’re not a fan of motion smoothing, disable it.
Be aware that turning it off may also disable other features like refresh rate doubling or image enhancement.
Step 5: Reduce the noise
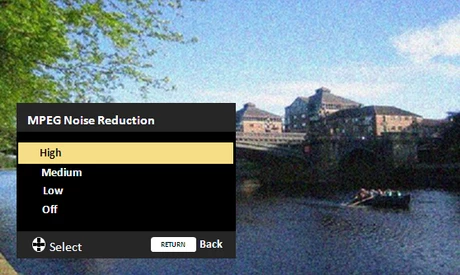
Noise means things like film grain, weird spots, and when the picture looks all blocky.
This used to happen more with old TVs and not-so-clear shows.
If you try to fix the noise, the picture might look better, but it can also make everything seem blurry and fake.
So, if you’re watching something in really good quality, like HD or 4K, turn off the noise fixer.
If you keep it on, you might not see all the tiny things and textures properly.
Related: 6 Things You’re Doing That Are Shortening the Life of Your TV
Step 6: choose the right service provider

In the current market, two TV service options are available: Cable TV and Satellite TV.
Each offers its own distinct features, so your choice will determine the quality of your viewing experience.
Ensure that your set-top box is HD, as some cable companies still offer non-HD boxes as a cost-saving measure. With Verizon Fios, switching to HD is as easy as pressing a button that appears on the screen.
Xfinity also allows you to filter the channel list to show only HD material. Make use of these tools to guarantee you’re watching at the right resolution.
F.A.Q.s
Q. Picture is looking even worse; how can I restore the default?
If adjusting your TV’s settings goes wrong, and the picture looks even worse than when you started, fear not.
It’s simple to start over. You can easily do it by resetting picture settings to the factory default. To do that:
- Go to Settings > Picture > Expert Settings > Reset Picture > Yes on Samsung TVs.
- If you have a Sony, go to Settings > Preferences > Picture > Reset > OK.
- For LG TVs, go to Settings > All Settings > Picture Mode Setting > Reset > Yes

Abdul Kader, a handy guy and experienced founder of a TV repair shop in Gulshan, Dhaka, Bangladesh. He is mainly an expert in understanding and repairing different types of issues with Smart TVs and providing helpful insights on how to keep them in good working order. Read his Full Story.