
Smart TV comes with various picture settings to make the picture look better and more attractive.
However, some options might seem useful or promising for enhancing picture quality, but they’re actually misleading.
In this article, I will discuss 5 TV settings that might catch your attention but are actually detrimental to your TV’s picture quality.
Let’s dive in…
1) Sharpness Control
Okay, let’s start with turning off your TV sharpness settings.
You might be thinking,
‘Wait, isn’t that counterproductive? Don’t we want a clearer picture?’
Well, here’s the thing: On most modern TVs, cranking up the sharpness doesn’t actually make things clearer.
Instead, it adds a fake sense of sharpness.
The TV does this by finding places where colors meet and making those lines look more defined. It’s like drawing extra lines to trick your eyes into thinking things are sharper than they really are.
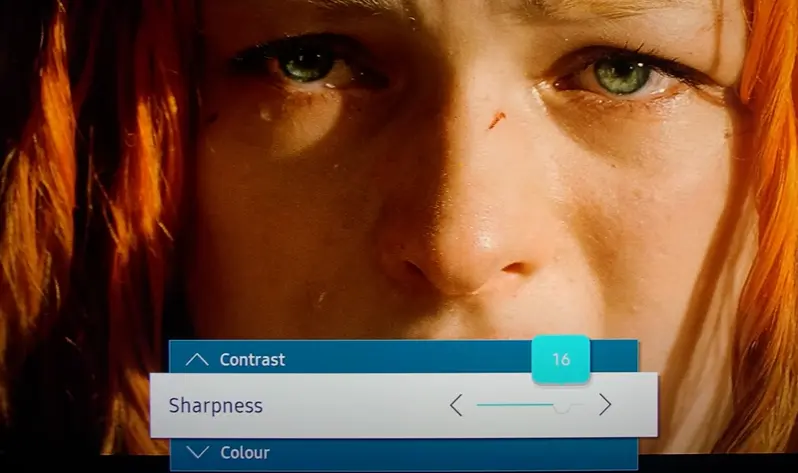
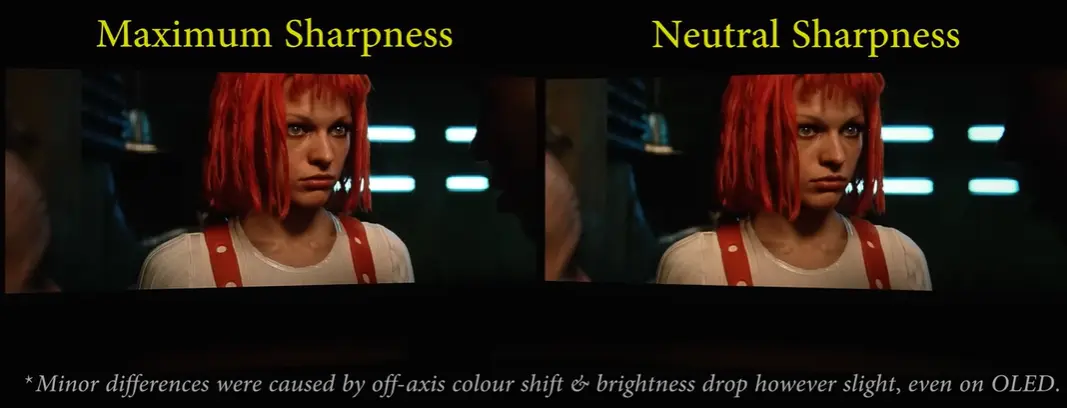
Look at this image:
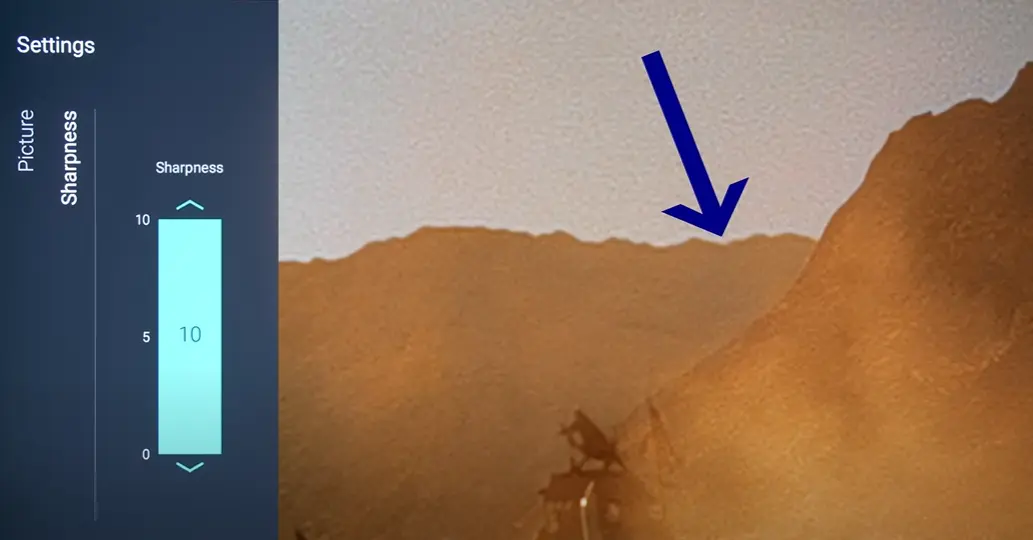
If you zoom in, you’ll notice that too much sharpness is creating weird lines and shadows around the edges of things.
These odd lines might even be visible when you’re sitting a normal distance from the TV.
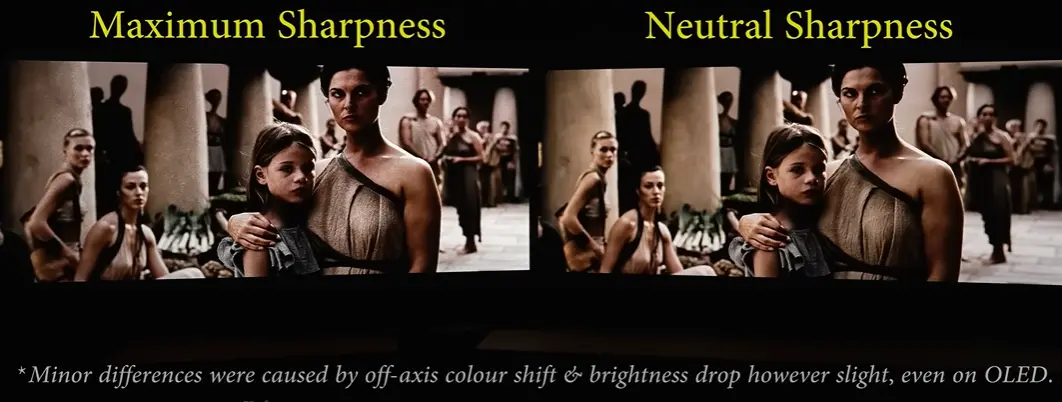
For example, you might even see them around mountains in a movie like Mad Max: Fury Road or around a character like Keanu Reeves in The Matrix.
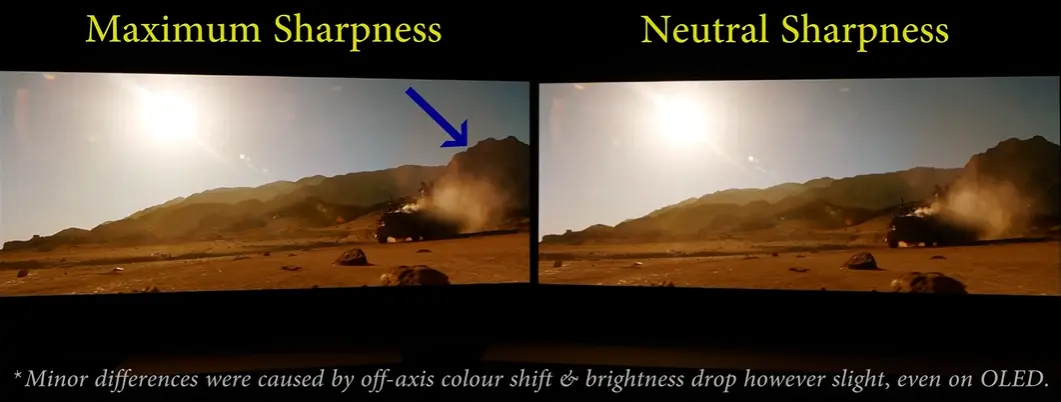
This extra sharpness can make things seem like they’re made of cardboard and overly fake, which takes away from the movie-like feeling.
Also, since the sharpness settings on most new TVs affect everything with contrast, it could even make the “grainy” texture in movies more pronounced, leading to a noisier picture.
Here’s another example from The Fifth Element: if the sharpness is turned up too high, you might notice some weird lines around people’s faces, especially where the light hits them just right.
Based on my 7 years of experience working with TVs, I can tell you that most 4K and high-definition content already looks pretty sharp.
Adding more sharpness can actually cause more issues.
So, if you want your TV to show things as naturally as possible, I strongly suggest setting the sharpness to a neutral level, where no extra sharpness is added.
However, the exact setting varies from manufacturer to manufacturer.
Here is a table listing the correct neutral sharpness setting for some of the more popular TV brands I’ve tested.
| Brand | Neutral Sharpness |
|---|---|
| LG | 0% |
| Panasonic | 0% |
| Philips | 0% |
| Samsung | 0% |
| Sony | 50% |
2) Noise Reduction
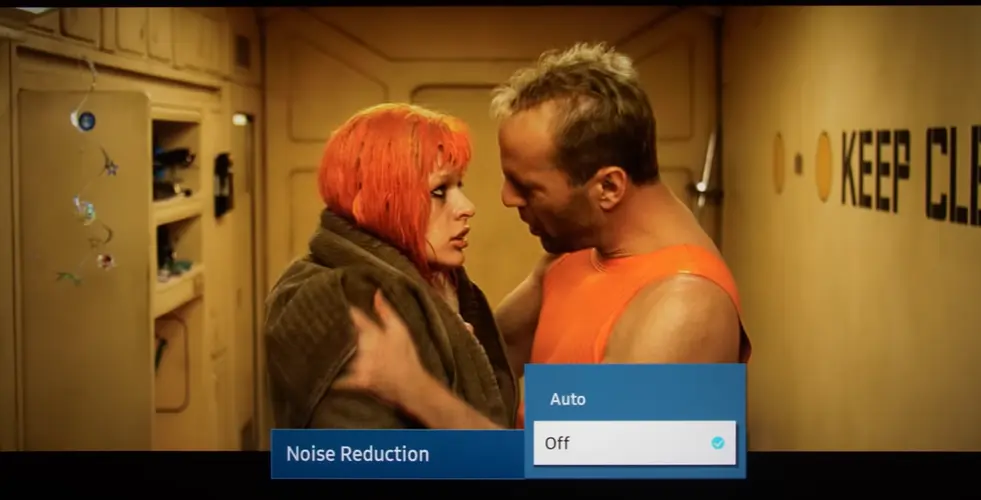
Next up, let’s talk about noise reduction – another setting to consider turning off.
At first, this might seem strange since you’d naturally want a clearer picture without any distracting noise, right?
But the truth is, the noise reduction tricks in many TVs aren’t clever enough to tell the difference between video noise and the natural grain in a film.
So, if you use noise reduction, it can actually remove the authentic film grain and make the picture look too clean, which isn’t what the director intended.
Also, turning the noise reduction up too high can make some small details disappear.
Here I am playing the 4K Blu-ray of Knives Out on a TV with noise reduction engaged.
Carefully see this image:

Look how the faces look strangely smooth and almost artificial!
But when I paused the movie, the details on the faces magically came back.
See This:
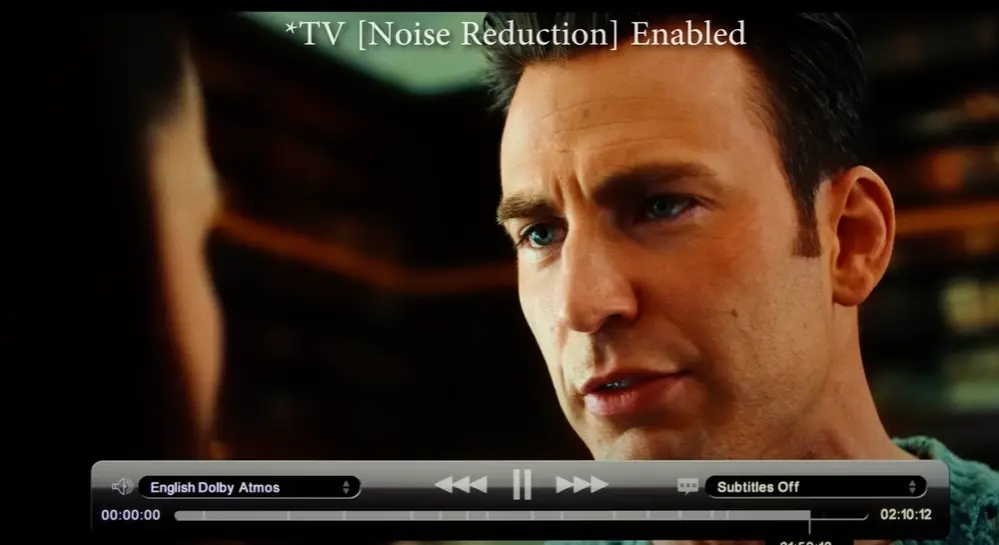
That’s because the film grain stopped moving, so the TV didn’t mistake it for noise and tried to remove it.
However, some noise reduction algorithms can also introduce a smearing or ghosting effect, most visible on facial movements, especially in dark scenes where high ISO camera noise is more pronounced.
3) Overscan
Look at this image:
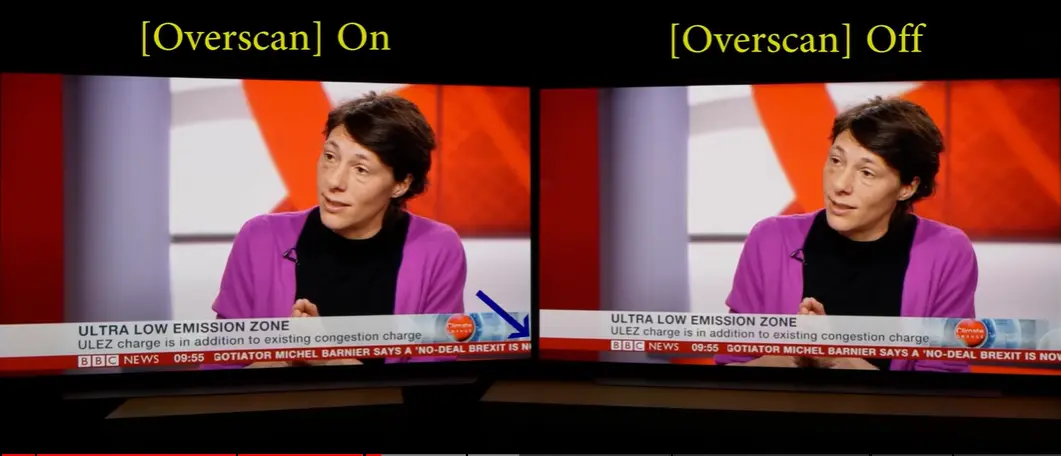
When I pause this news broadcast footage here, you may notice that the TV on your left has cropped away the borders of the picture.
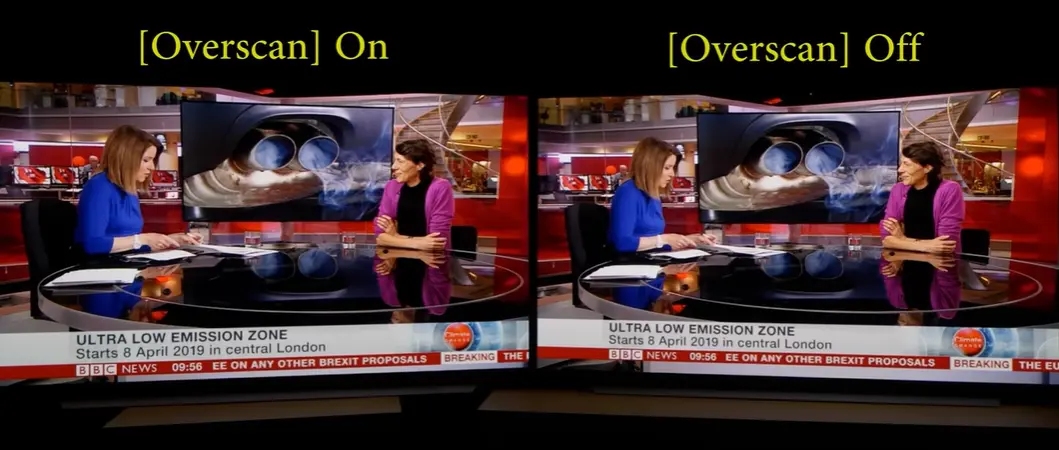
This is the result of overscan, a band-aid that was invented during the analog broadcast era but really should have no place today on digital television.
With overscan enabled, which is surprisingly the default practice on most modern televisions, you will be missing out on some information in the original video signal.
Different manufacturers have different names for the overscan settings on their TVs.
I have listed some of the popular ones in this table so you can find the setting and disable overscan on your TV to see the whole picture.
| Brand | Overscan Label | Zero Overscan Setting |
|---|---|---|
| LG | Just Scan | On |
| Panasonic | 16:9 Overscan | Off |
| Philips | Picture Format | Original |
| Samsung | Fit to Screen | On |
| Sony | Display Area | Full Pixel or +1 |
4) Motion Smoothing
The fourth TV setting you should switch off is an important, if somewhat controversial one: motion smoothing.
Some of you actually prefer motion smoothing, weirdos.
But as a purist, I absolutely cannot stand even the slightest amount of motion smoothing when watching movies because, to my eyes, it makes a cinematic movie look like it was shot on a cheap handheld camcorder, creating what is known as the Soap Opera Effect, or SOE.

The reason why 24 frames per second has continued to be the dominant language of cinema is because of the dreamy effect it creates.
At 24p, our brain can use its imagination to fill in the gaps for a more surreal experience, whereas, at higher frame rates such as 50p or 60p, which is what motion smoothing is trying to do, the video would look hyper-realistic, robbing the movie of any cinematic feel.
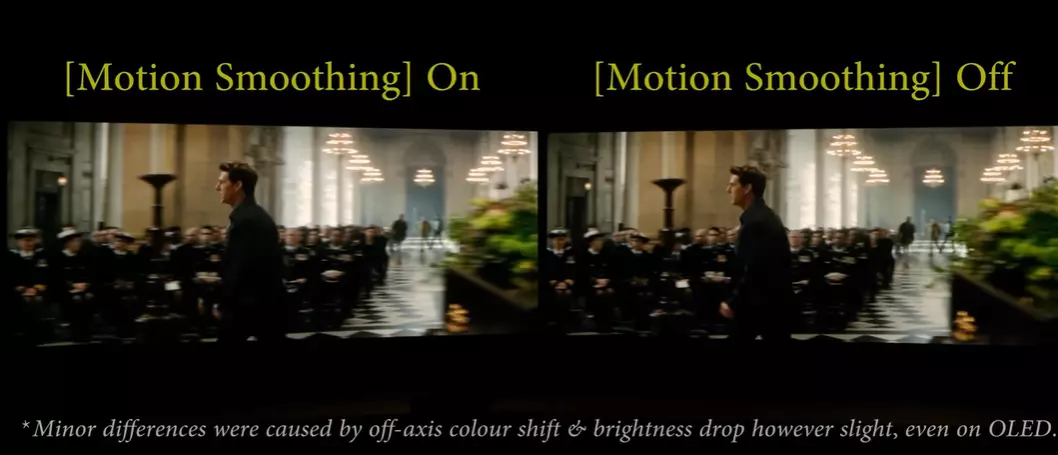
Motion smoothing also has another side effect because it involves some sort of motion interpolation, which artificially inserts new frames in between the original frames.

The calculations can go wrong, especially during complex moving sequences.
For example, look at this image:
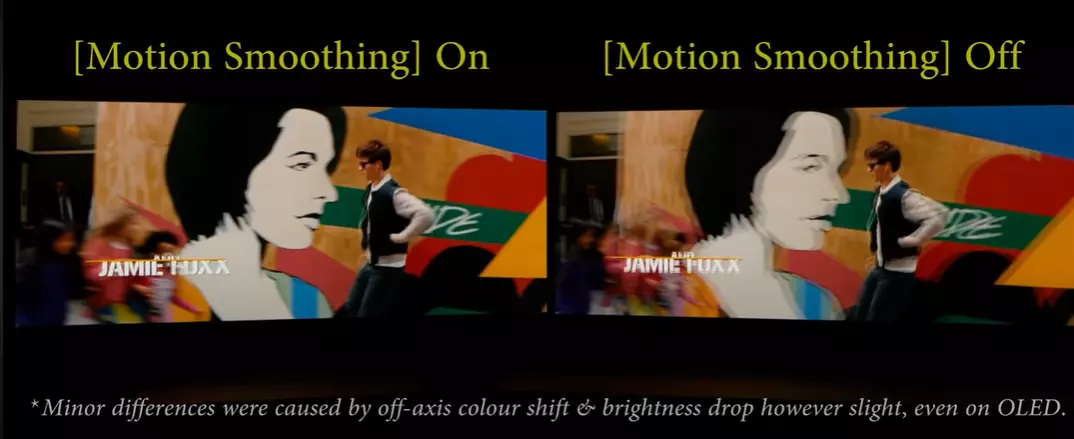
In this wonderful tracking shot in Baby Driver, you can see various interpolation artifacts surrounding the opening titles and also around Baby as he walks his way past different objects, either in the foreground or background.
And of course, we can’t leave out Tom Cruise, who advocated against motion smoothing.
5) Color Temperature
Color temperature plays a crucial role in accurately representing colors on your TV.
Opting for a bluer or cooler color temperature might seem appealing, but it can distort colors and skin tones, making them appear inaccurate.
To maintain true-to-life colors and achieve a viewing experience consistent with the filmmakers’ intent, choose a color temperature that aligns with industry standards, like the D65 white point.
However, to make things easier for you, there’s a handy feature called Filmmaker Mode that helps you avoid manual adjustments.
Basically, this mode turns off unnecessary picture enhancements to faithfully show the director’s creative vision.
To Enable it:
- LG: Press and hold the settings button, go to Picture, and select “Filmmaker Mode.
- Panasonic: Go to the Picture menu, choose Viewing Mode, and pick Filmmaker Mode.
- Philips: Press Settings, select AI Picture Style, and switch to Filmmaker Mode.
- Samsung: Press Home, go to Settings, select Picture Mode, and choose Filmmaker Mode.
Okay, now that you have selected Filmmaker Mode to obtain the correct TV settings, perhaps the next thing you would like to do is to boost the wired internet connection speed of your television by up to 500 percent.
I will also write a definitive guide on this and send it straight to your inbox.
Stay tuned.
F.A.Q.s
Q: Why would manufacturers include settings that actually make the picture worse?
It’s a bit of a head-scratcher, isn’t it?
These settings often exist to make the picture “pop” on a brightly lit showroom floor, not necessarily to look its best in your living room.
Think of it like a car salesman revving the engine – it gets your attention, but it’s not how you’d drive it home.
Q: I have an older TV. Do these settings still apply?
While these settings are most common on newer TVs, some older models might have similar options.
If you have settings like sharpness, noise reduction, or overscan, it’s still worth experimenting to see if turning them off improves your picture.
Just remember, your TV might call these settings by different names.
Q: What if my TV doesn’t have a Filmmaker Mode?
Don’t sweat it!
Not all TVs have this handy feature. You can still achieve a similar effect by manually adjusting the settings I mentioned in the article.
It might take a bit more effort, but it’s worth it for a more accurate and enjoyable viewing experience.

Abdul Kader, a handy guy and experienced founder of a TV repair shop in Gulshan, Dhaka, Bangladesh. He is mainly an expert in understanding and repairing different types of issues with Smart TVs and providing helpful insights on how to keep them in good working order. Read his Full Story.