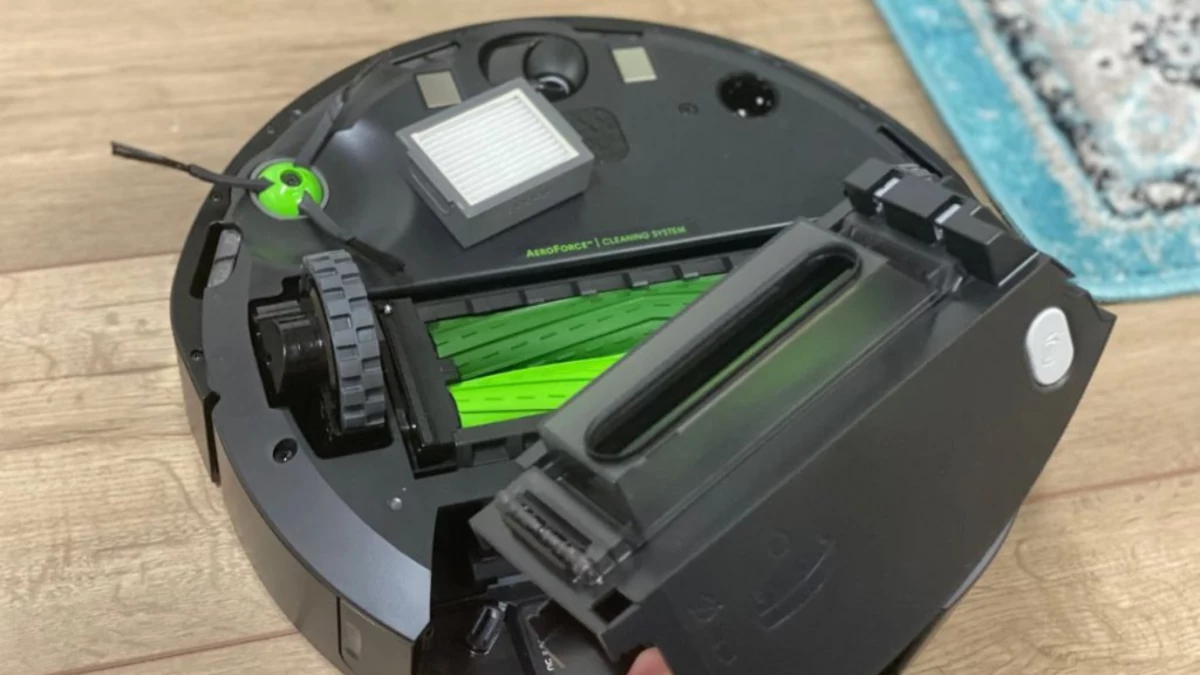
Cleaning the Roomba i7 might appear easy, but if you’re not familiar with the right steps, it can be challenging.
Don’t worry, though!
After going through this article, you’ll become a pro cleaner!
In this guide, I’ll show you how to clean your Roomba i7 in just 10-15 minutes without damaging any delicate parts.
Let’s dive in…
How to Clean Roomba i7
- Clean the home base first.
- Remove all tangles and hair from the side brush.
- Empty the dustbin and clean the air filter.
- Finally, clean the wheels.
Here are the detailed guidelines:
Step 1: Tools you need
To begin the process, you will need the following things:
- A Phillips Screwdriver.
- A dry cleaning cloth.
Step 2. Clean the Home-Base
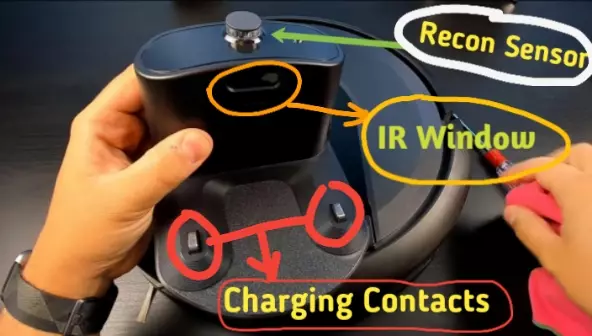
First, clean the home base.
This part is critical for charging the device, and if it becomes dirty, it may cause issues with the charging process.
It will also help to prevent errors like “Error 26“, “Charging Error 8” or “Error 34” in the future.
Here’s how:
- Grab the Home Base and first clean the Recon sensor.
- Then clean the IR window.
- Finally, clean the charging contacts.
Cleaning the charging contacts will ensure the Roomba can dock and charge correctly. If these contacts are left uncleaned, the vacuum may experience difficulties during the docking process.
Step 3. Remove all tangles and hairs
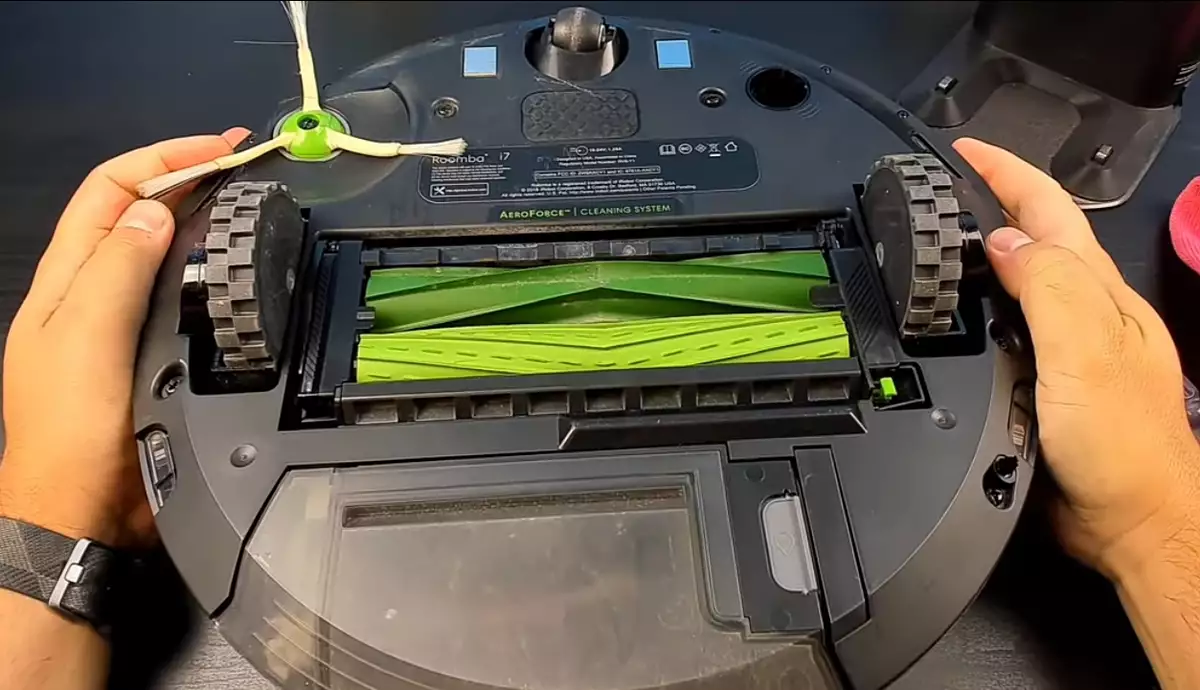
After cleaning the home base, head to the bottom of your Roomba. Clean out all the tangles and hair caught inside all the rollers and brushes.
☞ Clean the Side Brush
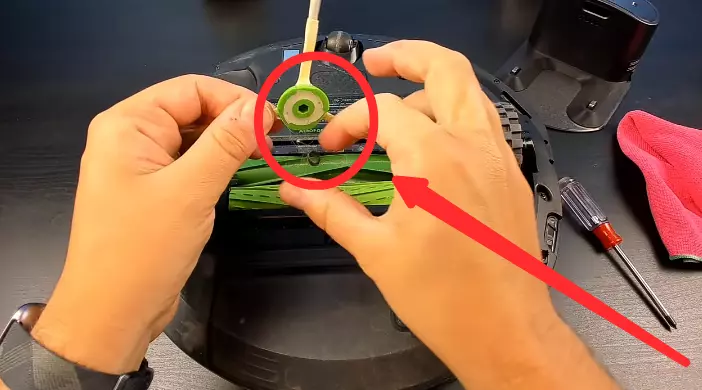
First, take out the side brush with a screwdriver.
You will see a lot of hair caught up in the brush. Remove all the hairs and put the brush in place.
Removing the hair or tangles from the side brush will help you make your Roomba quieter and give you relief while cleaning.
☞ Clean the Caster wheel
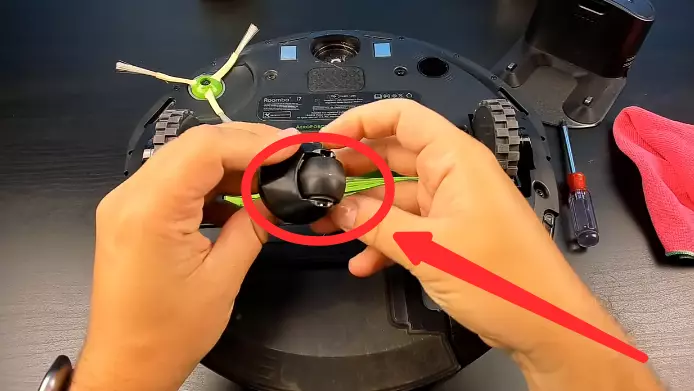
After cleaning the hair and tangles from the side brush, check and clean the caster wheel. To lift the caster wheel out, grasp it firmly.
After you’ve lifted it out, push the wheels out and clean up any tangles. Once you have removed all the hairs and tangles, place the caster wheel back in.
☞ Clean the Roomba i7 Roller Brush
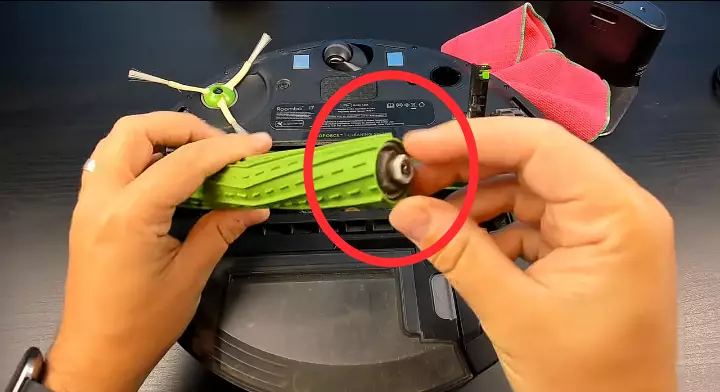
Here’s how to clean the roller:
- Move on to the main brush.
- Pull it out and remove any hairs, tangles, or knots from it.
- Remove all the tangles and clean the debris from the brush compartment with a dry cloth.
- Once you have cleaned the main brush and its box, put the brushes back in and attach them firmly.
Be sure to clean all the visible sensors on the Roomba. If those sensors are left dirty, you will get a bin error.
Step 4. Empty the dustbin and air filter.
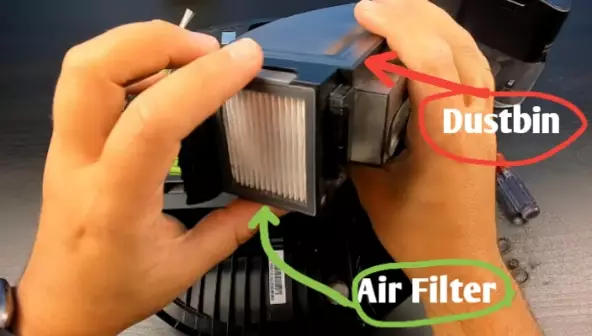
Next, empty the vacuum dustbin and clean the filter.
Depending on how frequently you use the cleaner and how much debris it gathers from your floors, the bin inside your Roomba may become quite full.
Follow the instructions below to unclog your Roomba’s dustbin securely and effectively.
☞ Clean the Filter
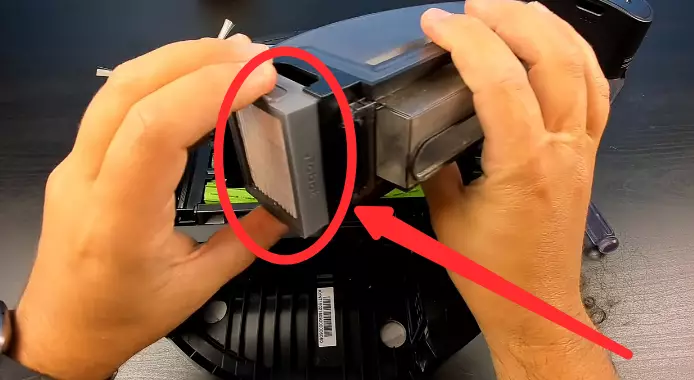
First, pull out the air filter. Sometimes, this air filter causes the most problems, including bin error.
If this air filter clogs up, it will restrict the airflow and sensors inside the Roomba.
As a result, your Roomba will think the dustbin is full and give you a bin error message.
Pro Tip: Wash the air filter instead of brushing it and let it dry completely before reinstalling. It will boost your robot’s cleaning performance as well as help you to get rid of bin errors.
☞ Wash the Dustbin
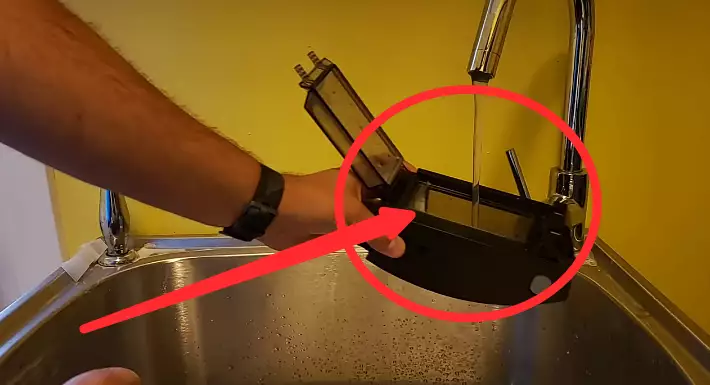
After cleaning the air filter, clean the dustbin. Emptying a Roomba dustbin is pretty easy.
Here’s how:
- Press the bin release button and remove the dust bin from the robot.
- Then, open the bin door and dump the contents into the trash can.
- Wash the dustbin with warm water and let it dry completely.
- Finally, reattach your Roomba’s dustbin. Make sure it clicks back into place securely.
From the below link, you can read our complete guide to learn more about emptying Roomba’s bin.
Step 5. Clean the wheels

Cleaning the wheel is the final step in this cleaning guide.
Simply take a dry cloth and remove the dirt and debris from it.
Then roll the wheels and remove all the hairs and tangles. If you want to know more about cleaning the wheel, click this link.
How to clean sensors on Roomba i7
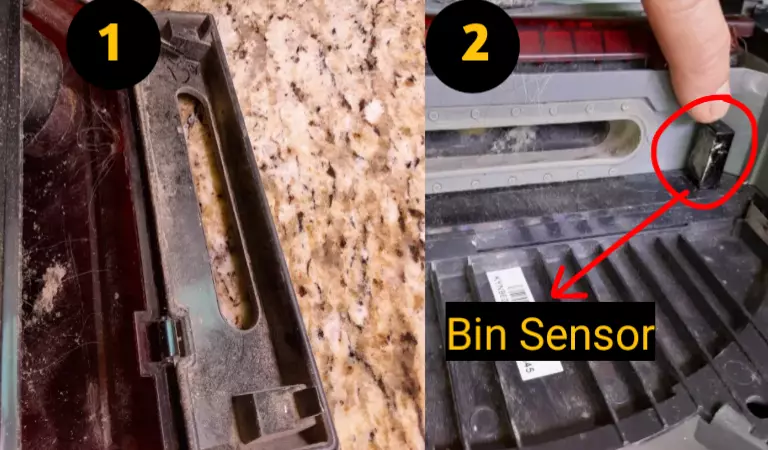
Cleaning the full bin sensor on Roomba i7 is the most crucial part of this article!
If you have emptied the dustbin but left the bin sensor dirty, your Roomba will give you a “bin error” message when you start it again.
This is because the bin sensor inside the dustbin is dirty.
The sensor in the bin is located at the end of the pointer in the upper right-hand corner of the first picture.
Here’s how:
- Firstly, make sure that your Roomba is turned off.
- Once it is turned off, open up the dustbin.
- Locate the Full Bin Sensor (as shown in the picture). It is a small silver cylinder located near the hinge on the right side of the dustbin.
- Use a microfiber cloth to clean around the sensor. Be careful not to damage the sensor.
Once the sensor is clean, put the dustbin back on the Roomba and turn it on.
Tips for Regular Maintenance
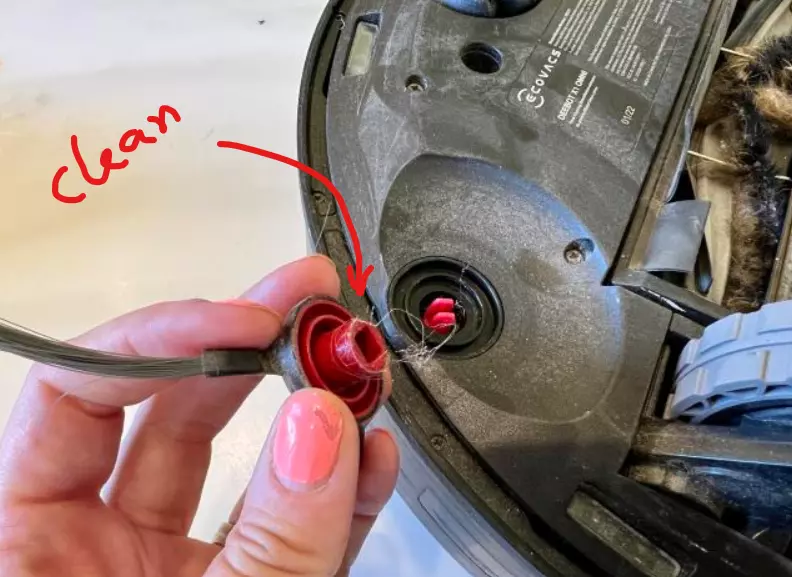
To ensure your Roomba i7 remains in peak condition and continues to deliver exceptional cleaning performance, it’s crucial to adhere to a routine maintenance schedule.
Here are essential tips for maintaining your robotic vacuum:
1) Clean Your Roomba i7 After Every Use
After each cleaning cycle, take a few moments to clean your Roomba i7.
Remove any debris, hair, or dirt from the brush rollers and the dustbin.
This practice helps prevent clogs and ensures your Roomba can efficiently pick up dirt during its next cleaning session.
2) Regularly Inspect and Clean the Sensors
The sensors on your Roomba i7 play a vital role in navigation, allowing it to avoid obstacles and efficiently cover your home.
Regularly inspect these sensors for dust, dirt, or smudges that may impair their functionality.
Gently clean them with a soft cloth to ensure accurate navigation and obstacle detection.
3) Replace the Filter and Brush Rollers as Needed
Over time, the filter and brush rollers of your Roomba i7 may wear out or become less effective.
Keep an eye on their condition and replace them when necessary.
F.A.Q.s
Q: How often should I clean the Roomba i7?
The frequency of cleaning your Roomba i7 depends on usage.
As a general guideline, it’s recommended to clean the dustbin and filter after each cleaning session or at least once a week.
However, if you have pets or your Roomba runs daily in a high-traffic area, you might need to clean it more frequently, approximately every 2-3 days.
Q: Can I wash the Roomba i7’s filter?
No, you can’t wash the Roomba i7’s filter.
Filters are not designed to be washed or to come in contact with liquid.
Q: Is it necessary to clean the extractors after every use?
While it’s not mandatory to clean the extractors after every use, doing so will ensure optimal performance.
If the Roomba i7 picks up a lot of hair or debris during its cleaning sessions, it’s a good idea to check the extractors for tangles and clean them out regularly.
Neglecting to clean the extractors could lead to reduced cleaning efficiency and might even cause the robot to stop working.
Q: Should I remove the battery when cleaning?
No, you don’t need to remove the battery while cleaning the Roomba i7.
The cleaning process doesn’t require access to the battery compartment. Removing the battery can be complicated and is unnecessary for routine cleaning.

Vacuum master from Gazipur, Bangladesh! He knows vacuums inside and out and has been fixing them for ages. When he’s not busy repairing vacuums, Mizanur writes these super helpful guides for Homespoiler.com. His guides are packed with all sorts of tips and tricks to help people fix their vacuums and keep them running smoothly. More about him.

